
LSMW (Legacy System Migration Workbench)
LSMW is a standard tool provided by SAP. Normally, LSMW is used for data migration. But in some case that we have to create/update huge volume of data, LSMW is the good choice as well. SAP provides 4 types of LSMW which are:
1. Standard Batch/Direct Input
Standard Batch/Direct Input is a program provided by SAP. To use this method, you have to know object, method and program name (SAP required to enter these parameters before start execution). Moreover, you have to create structure as SAP required. The advantages of this method are: 1) you can create/update data in the same time. 2) you can update many record of sub-information in the same time such as create/update/delete bank information in vendor master. 3) You can post document with many line items. Each document doesn’t need to have the same no. of line item. This method also have disadvantage that you may take much more time to create structure and read document before starting.
2. Batch Input Recording
Batch Input Recording is a method that you have to record your own structure. This method is easy to start. You just do what you exactly do when you create/update data in system. System will record all field that you click and update value. Then, you just create file as same as the structure of recording and let system update. The advantage of this method is easy to understand and use. But it’s not flexible enough to update complicate data.
3. Business Object Method <Update soon>
4. IDoc <Update soon>
The popular method is Standard Batch and Batch Input Recording. These 2 methods are easy and cover most of transactions in system.
Menu Path
T-Code: LSMW
How to do LSMW Batch Input Recording (Step-by-Step)
1. Create Project, Sub-Project and Object
2. Maintain Object Attributes
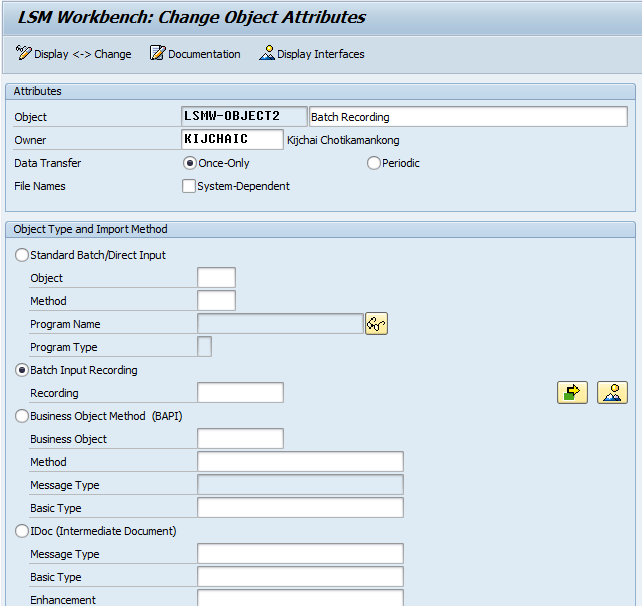
Choose : Batch Input Recording
This is the second method of LSMW. This method will ask you to record data like to record video. Once you record completely, you can add variable to change field in the screen that you already recorded. First of all you have to create your recording first by press
 <Recording Overview Button>
System brings you to new screen, you have to press <Create Recording Button> on top left to record yours.

Then, system will ask you to name your recording. To make it easy for remember, you should name it as same as Transaction Code. Press <Enter>

Enter Transaction Code that you need to record. System will bring you to that T-Code screen. You just post/maintain in screen as usual. System will record all fields that you maintain.

Once recording is completed, you will see a list of screen fields. This is very important. You have to remove all screen field that you don't need to input value. Otherwise, default value in this screen will overwrite existing value.

The next step is to name all fields. You can do easily by press <Default all button>
3. Maintain Source Structures


In this step, you have to create 1 structure. Structure is used to do data matching between your input file and recording fields. For Batch Recording Method, you need to create only 1 structure.
4. Maintain Source Fields

You create fields under structure that is created in <topic 3>. You don’t need to create all fields but just create only the fields that you need to update value.
5. Maintain Structure Relations
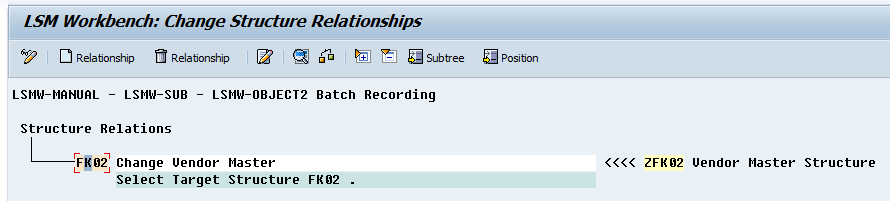
You have to assign source structure in previous step to standard structure. System will use this mapping for input value.
6. Maintain Field Mapping and Conversion Rules
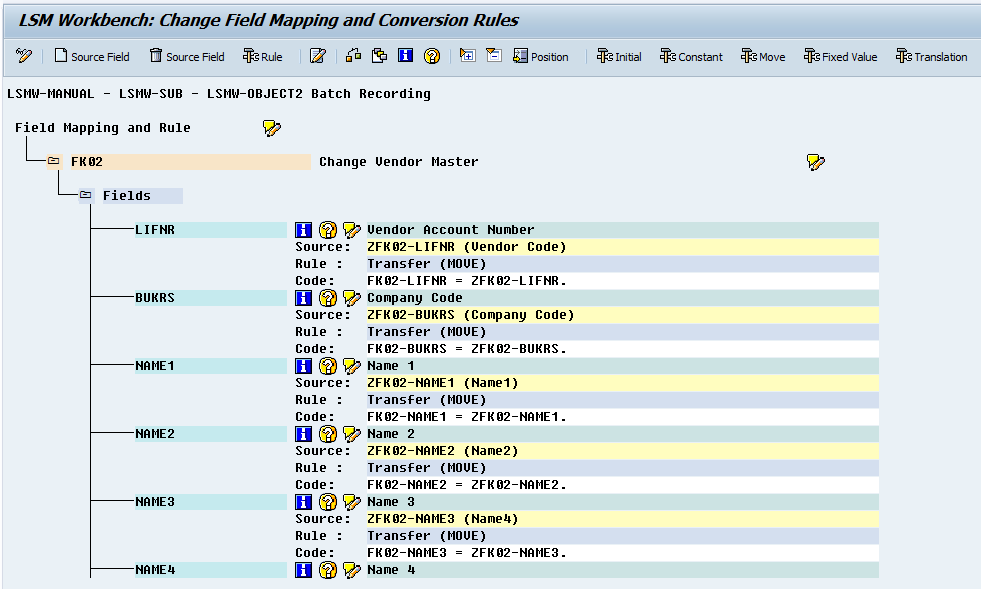
In this step, you can do a mapping between your structure and standard structure in level of field. You don’t need to do a mapping manually. System provide mapping function “Auto-Field Mapping or press <Ctrl + Shift + F3>” (Menu Bar >> Extras >> Auto-Field Mapping). For recommendation, Auto-Field Mapping work from field name. So, it would be an advantage if you create structure with the same name as standard structure.
7. Maintain Fixed Values, Translations, User-Defined Routines <do nothing>
8. Specify Files

Right now you are almost finishing your LSMW. This step, you have to create how system read your input file. SAP allows you to upload file from your PC and SAP directory. You just click on the type of input file that you want and press button <create>.
9. Assign Files

In this step, you have to assign input file from your PC/SAP directory to your structure. System will know where to read input file from this step.
10. Read Data


Execute this step to read data from input file. System read data from your file that assign in previous step. Once system read data successfully, it shows message as below:
11. Display Read Data


To make sure that input data is correct, system allows you to display input data in this step.
12. Convert Data

Press execute button to convert data. Convert data means system convert input data to fit with standard structure. Please note that in this step you will see at least 3 records (refer to step 5).
13. Display Converted Data


Check your input data again. In this step you will see that your input data is split into 3 structures. Check each structure carefully. If everything is OK! Then go to next step.
14. Create Batch Input Session
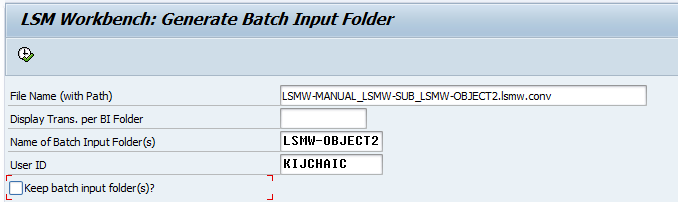
In this step, system will let you create batch session. You just follow the standard parameter by press execute button only.
15. Run Batch Session


This is the last step that leads you to the new screen for running batch session. It’s the same screen as SM35. You just select your batch session and press <process button> as usual.

Check result to make sure that all data is updated by using LSMW.
Hope this help you guys understand how to use SAP LSMW. If you have any question or need help, you can left your question on my blog. I will try to help ASAP.


2 Comments
Thanks for sharing this Information, Got to learn new things from your Blog on SAP SF.
ReplyDeleteSAP SF
Call us at eight one two two two four one two eight six.
It’s amazing in support of me to have a site, which is useful in support of my know-how. thanks admin|, you surely come with remarkable articles. Cheers for sharing your website page.Excellent blog here...
ReplyDeleteSAP HR Training in Chennai
SAP SD Training in Chennai
SAP Basis Training in Chennai