
Scenario: In most of the development scenario, some customizing tables are created. To maintain the records in these tables by the Functional consultants, In SPRO, the node is created for the same.
This post describes how to add a new node in SPRO.
Step1. Go To Tcode- SE11.

Step2. Provide a table name and click on create button.

Step3. Provide the details and clikc on technical settings button.

Step4. Maintain the technical settings and click on Back button.

Step5. Maintain the below mentioned fields and activate the table.

Step6. Naviagte along the highlighted path to cretae TMG for the table.

Step7. Provide the details and click on Cretae button.

Step8. TMG is cretaed & then click on Back button.

Step9. Now Go to Tcode- SM30.

Step10. Provide teh table name and click on Maintain button.

Step11. Click on new entries button.

Step12. Here the user can mainain the details.

Step13. Let's decide the node under which we can add this table as a node. Go to Tcode- SPRO.

Step14. Click on SAP Referencce IMG.

Step15. We figured out that, we will add this customizing table under the Structure(Node) : Sales and Distribution.

Step16. Go to Tcode : SIMGH.

Step17. Click on the F4 buuton against IMG Structure.

Step18. Grom the search criteria. provide 'sale' and click on Execute button.
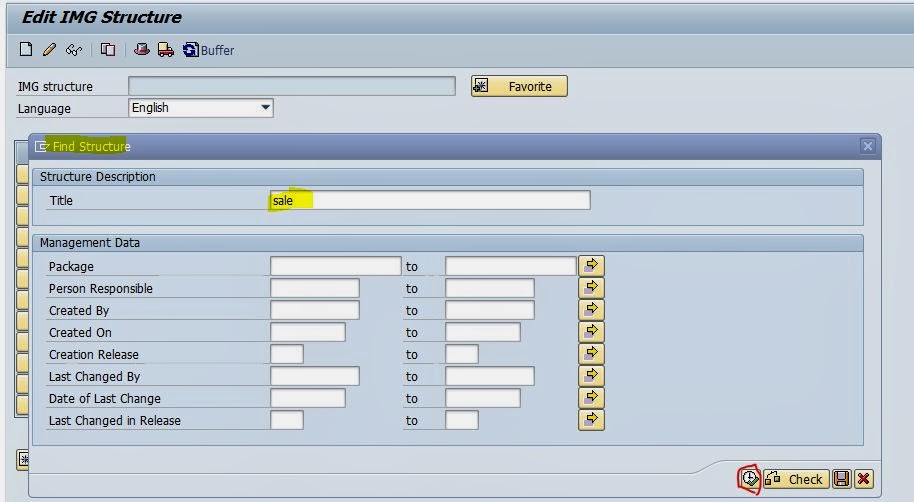
Step19. Select our decided structure "Sales and Distribution.".

Step20. Now click on Edit button.

Step21. Click on English .

Step22. Select the Structure 'Sales and Distribution' and click on the highlighted button .

Step23. Provide the ID 'ZZ_TAX_EXM_ID', Name 'Mainataining TAx Exemption ID'.
Under the 'Document' tab, provide the document name 'ZZ_TAX_EXM_ID_DOC' and clcik on Create button.

Step24. Mainatain some help document for the user for F1 purpose and activate it. Go Back.

Step25. Now clcik on Maint. Objects tab as highlighted.

Step26. Povide the Maintenanace Object : ID 'ZZ_TAX_EXM_MAINTAIN' and Name 'Maintain Tax Exemption'.
Under the assigned Object section, provide table name 'ZCOUN_TAX_EXEMP' as Customizing Object, Select Type As 'S', and Transaction as SM30. Save it and Go Back.

Step27. The Node appears under the structure "Sales and Distribution" as follows. Click on the highlighted part in red color to test it.

Step28. It calls the correct customizing table screen. Click on new entries button .

Step29. Here the user can maintain the records.

Step30. To check, go to SPRO transaction.

Step31. Clcik on SAP Reference IMG.

Step32. Expand Sales and Distribution Node and the created object appears here. Execute it.

Step33. Click on New Entries.
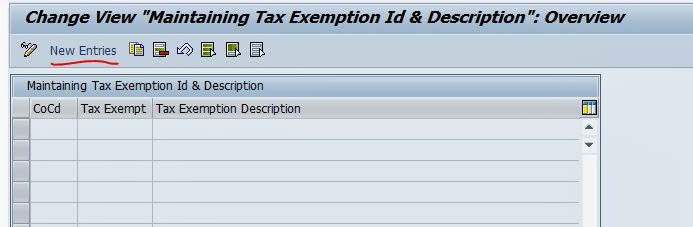
Step34. Maintain one record and save it and go back.

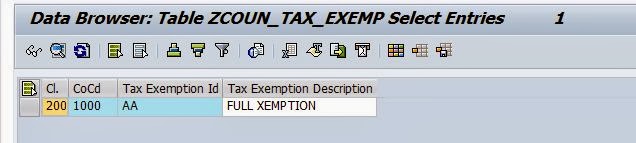
Step35. Now go to SE11 to check the table entries.

Step36. Execute it.

Step37. The created record in SPRO exists here.
_______________________________
This post describes how to add a new node in SPRO.
Step1. Go To Tcode- SE11.
Step2. Provide a table name and click on create button.
Step3. Provide the details and clikc on technical settings button.
Step4. Maintain the technical settings and click on Back button.
Step5. Maintain the below mentioned fields and activate the table.
Step6. Naviagte along the highlighted path to cretae TMG for the table.
Step7. Provide the details and click on Cretae button.
Step8. TMG is cretaed & then click on Back button.
Step9. Now Go to Tcode- SM30.
Step10. Provide teh table name and click on Maintain button.
Step11. Click on new entries button.
Step12. Here the user can mainain the details.
Step13. Let's decide the node under which we can add this table as a node. Go to Tcode- SPRO.
Step14. Click on SAP Referencce IMG.
Step15. We figured out that, we will add this customizing table under the Structure(Node) : Sales and Distribution.
Step16. Go to Tcode : SIMGH.
Step17. Click on the F4 buuton against IMG Structure.
Step18. Grom the search criteria. provide 'sale' and click on Execute button.
Step19. Select our decided structure "Sales and Distribution.".
Step20. Now click on Edit button.
Step21. Click on English .
Step22. Select the Structure 'Sales and Distribution' and click on the highlighted button .
Step23. Provide the ID 'ZZ_TAX_EXM_ID', Name 'Mainataining TAx Exemption ID'.
Under the 'Document' tab, provide the document name 'ZZ_TAX_EXM_ID_DOC' and clcik on Create button.
Step24. Mainatain some help document for the user for F1 purpose and activate it. Go Back.
Step25. Now clcik on Maint. Objects tab as highlighted.
Step26. Povide the Maintenanace Object : ID 'ZZ_TAX_EXM_MAINTAIN' and Name 'Maintain Tax Exemption'.
Under the assigned Object section, provide table name 'ZCOUN_TAX_EXEMP' as Customizing Object, Select Type As 'S', and Transaction as SM30. Save it and Go Back.
Step27. The Node appears under the structure "Sales and Distribution" as follows. Click on the highlighted part in red color to test it.
Step28. It calls the correct customizing table screen. Click on new entries button .
Step29. Here the user can maintain the records.
Step30. To check, go to SPRO transaction.
Step31. Clcik on SAP Reference IMG.
Step32. Expand Sales and Distribution Node and the created object appears here. Execute it.
Step33. Click on New Entries.
Step34. Maintain one record and save it and go back.
Step35. Now go to SE11 to check the table entries.
Step36. Execute it.
Step37. The created record in SPRO exists here.
_______________________________


2 Comments
Good one!!
ReplyDeleteexcellent ..
ReplyDelete